For those of us interested in creating our own cross stitch patterns; to sell or for our own pleasure, it is important to create snappy and readable graph charts. We want our makers to concentrate on creating rather than figuring out what goes where.
Today, we’re going to give you a handy step by step guide to creating clear, crisp and smart graph templates in Adobe Illustrator.
Before we begin, it will help if you are familiar with Illustrators terms and processes. If you are new to Illustrator, have a few practice runs before you create your first official graph template.
Read to create your own pattern?
In Illustrator, we will set up the grid like a double-size 14-count Aida (so it’s easier to see as a pattern). To do this:
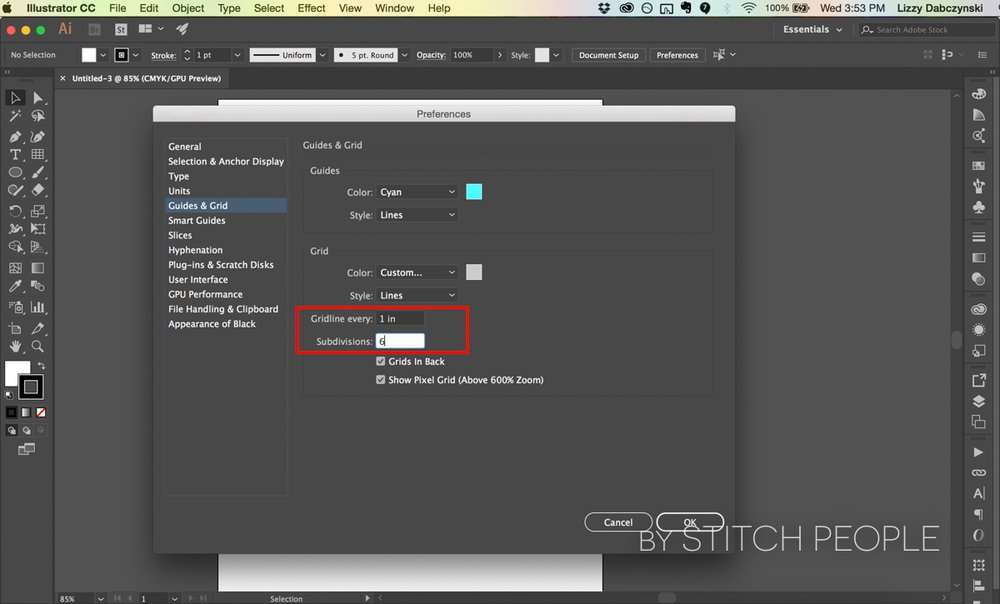
1. Go to “Illustrator CC” in the top, left corner. Hover over “Preferences” and select “Guides & Grid”

2. In the Preferences window that opens, change the grid so there are gridlines every 1 inch, with 6 subdivisions. This makes seven squares per inch. (14 squares per two inches = double the size of size 14 Aida.) Click OK.
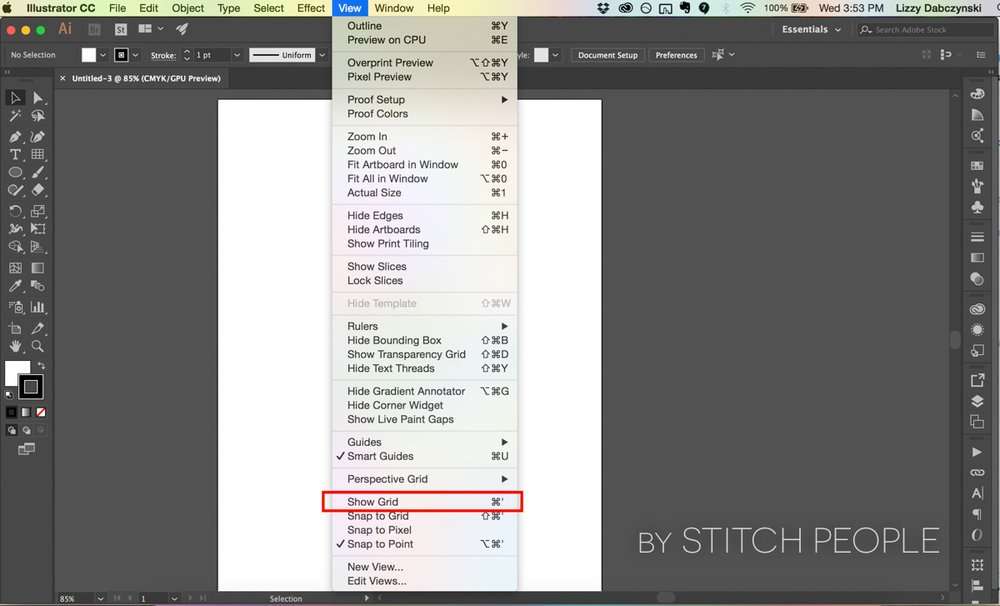
3. Click on “View” in the top menu and click on “Show Grid”
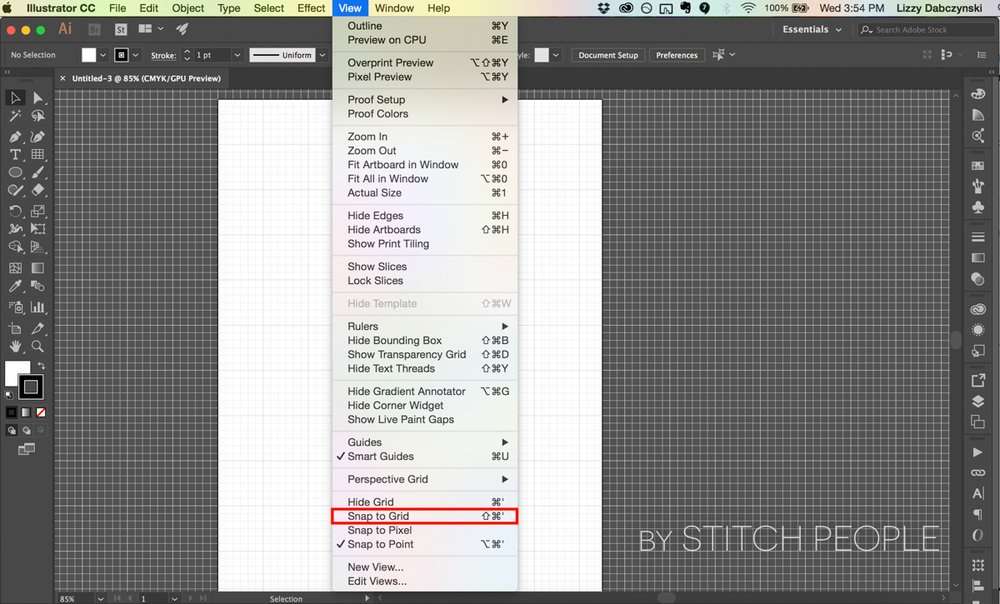
4. Click on “View” again in the top menu and select “Snap to Grid”
You can stop here if you don’t care to later print your pattern and SEE a grid. You can make squares over the grid you just selected to “show” using the rectangle tool (Hold down “SHIFT” to keep the tool square.)
However, if you like to print patterns, and want to see a grid beneath your squares of color, complete the following steps:
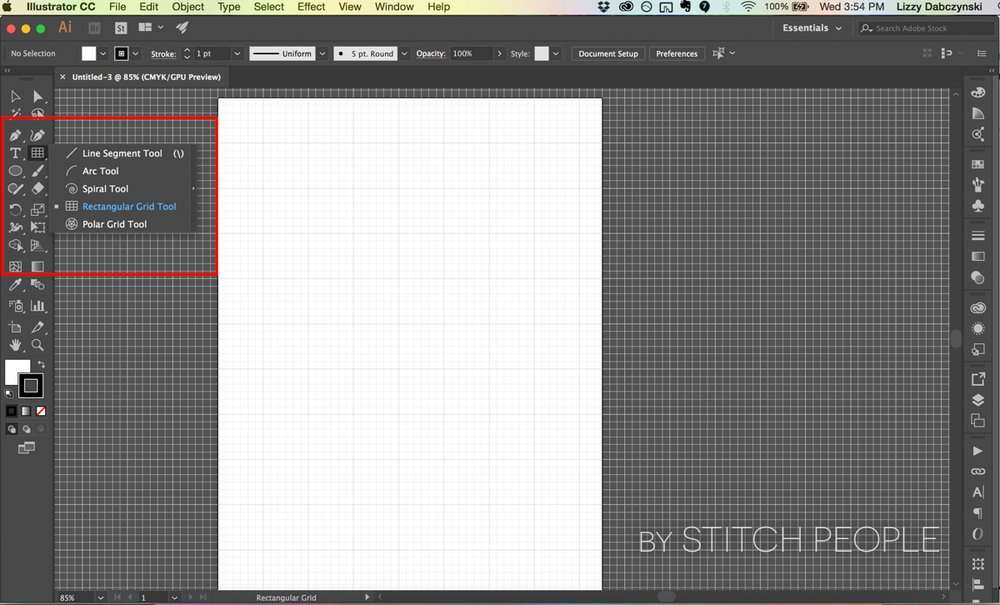
5. In the tool menu to the left, long-click on the “Line Segment Tool” and select from the dropdown the “rectangular grid tool”
6. Click once on your art board (don’t click and drag). The “Rectangular Grid Tool Options” window will open.
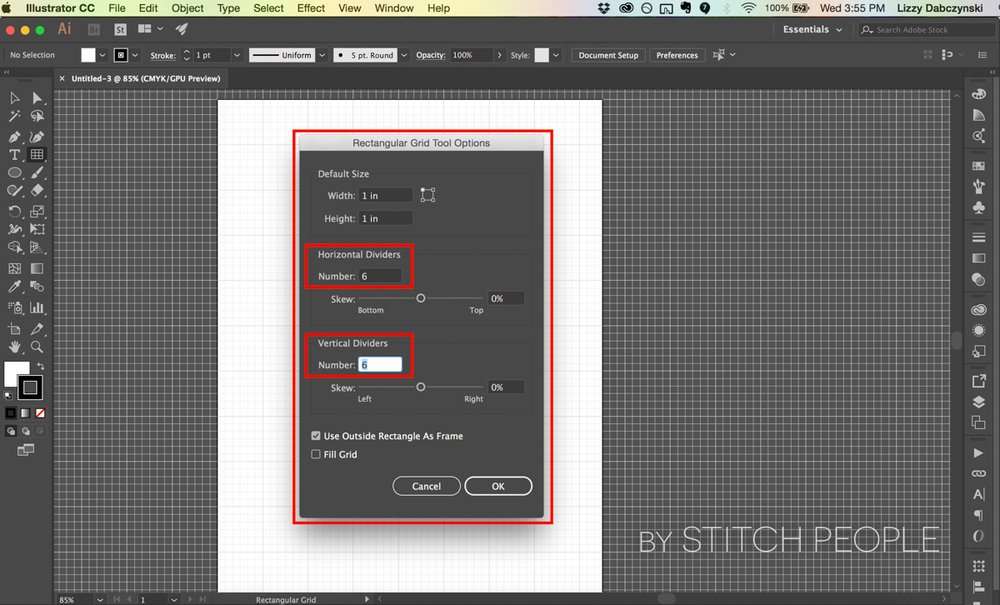
7. Change the options here to match those of your grid preference for your document. So the default size should be 1 in x 1 in, the horizontal dividers should be 6 and the vertical dividers should also be 6. I recommend selecting “Fill Grid” as well. This will create a square shape full of grid lines.
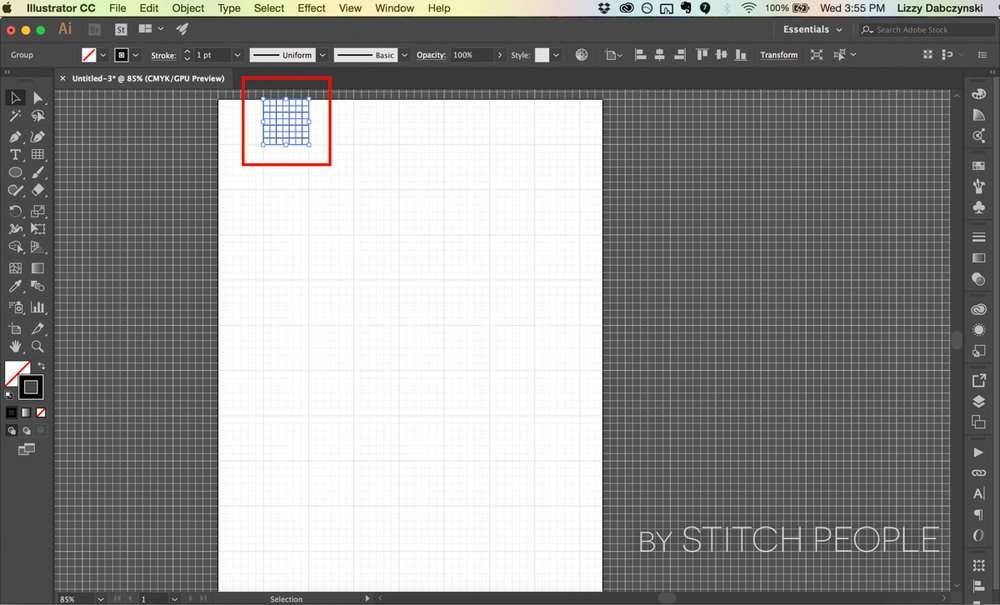
8. This will create a square shape full of grid lines. Copy and paste this as many times as you need to fill your artboard. Using keyboard shortcuts here is very helpful (arrows and shift to move things around more quickly, ALT will duplicate the selected object).
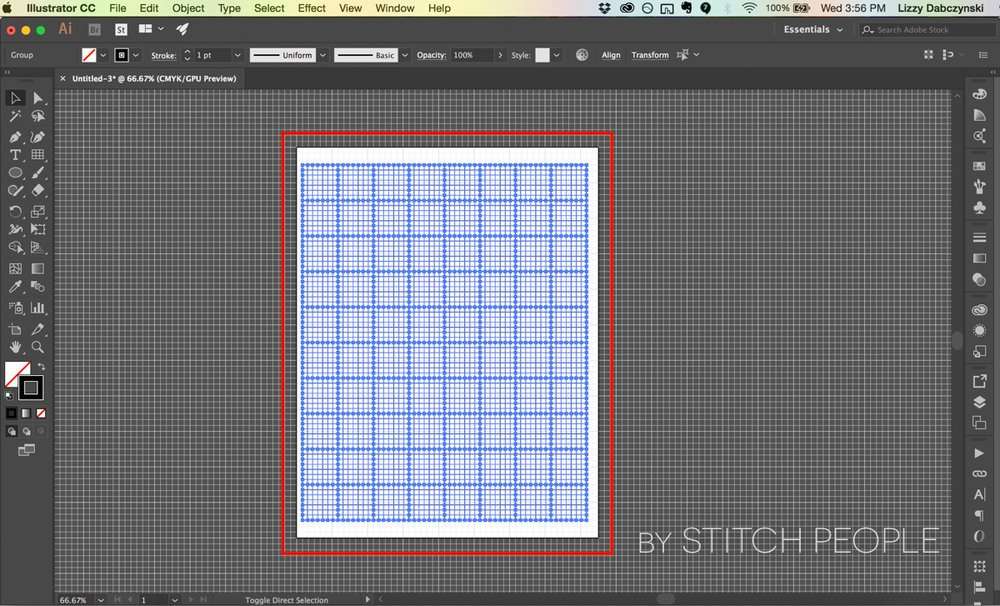
9. Using your cursor, you can click and drag a selection around all of the grid boxes you just created, copied, and pasted to create your grid. I recommend changing the fill to be white, and the stroke to be black or dark grey.
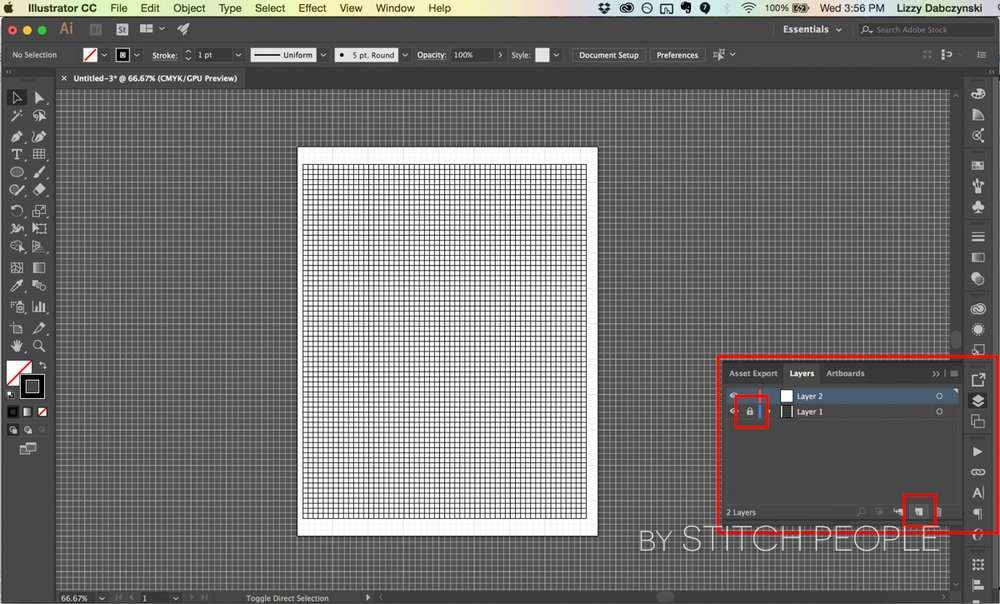
10. I HIGHLY recommend opening the “Layers” Window, and “Locking” this layer of the grid so you don’t accidentally move it around as you work on your pattern. After locking, create a new layer that will sit on top of this locked “grid” layer, and create your pattern there.
And there you have it! You’re template is ready to be filled with your lovely designs.
If you have any questions about this or any other Stitch People related issue, we’re always open! Contact us at info@stitchpeople.com
Happy Creating!
The rectangle grid worked with the 1×1 and 6 dividers. But in preferences, for a grid line every 1in and 6 subdivisions, as you stated, it only gave 6 squares per inch, I had to change the subdivisions to 7 to get the seven squares per inch….was there a typo or is my illustrator program weird?