by Stitch People Designer, Hillary Nestrick
Well, hello there, Stitch People! I don’t know about y’all, but summer plans are absolutely heating up here in my house! Between vacation planning and bracing myself for my two highly energetic kiddos being home for the summer break, I’m up to my eyeballs in crazy! However, I’m never too busy for Stitch People!!
Just in case you hadn’t heard, Stitch People just released Ice Skating patterns! They were the most fun to design and I hope y’all love them as much as I do! For this month’s post, I wanted to make a how-to tutorial for the ice skates and my process for stitching them!
Side Note: I’m using 28 count fabric for this demo. 28 count can be scary to a person new to cross stitching. I myself was too nervous to try for the longest time, but once I jumped in (thanks Covid lockdown) and tried it, my goodness, it’s my go to!! It’s so versatile and makes stitching the less common stitches super easy and an absolute breeze!! So, what I’m trying to say is don’t fear the 28ct!! But, if you’re a die hard 14 count fan, no worries, it will turn out just as nice.
STEP 1: STARTING OFF
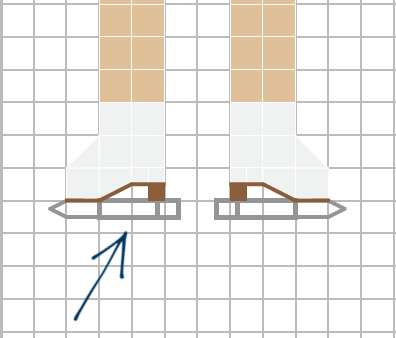
Start with the ice skate blades.
Using two strands, backstitch the blades’ vertical lines, then the horizontal lines. I do this for layering purposes and you’ll see at the end why!
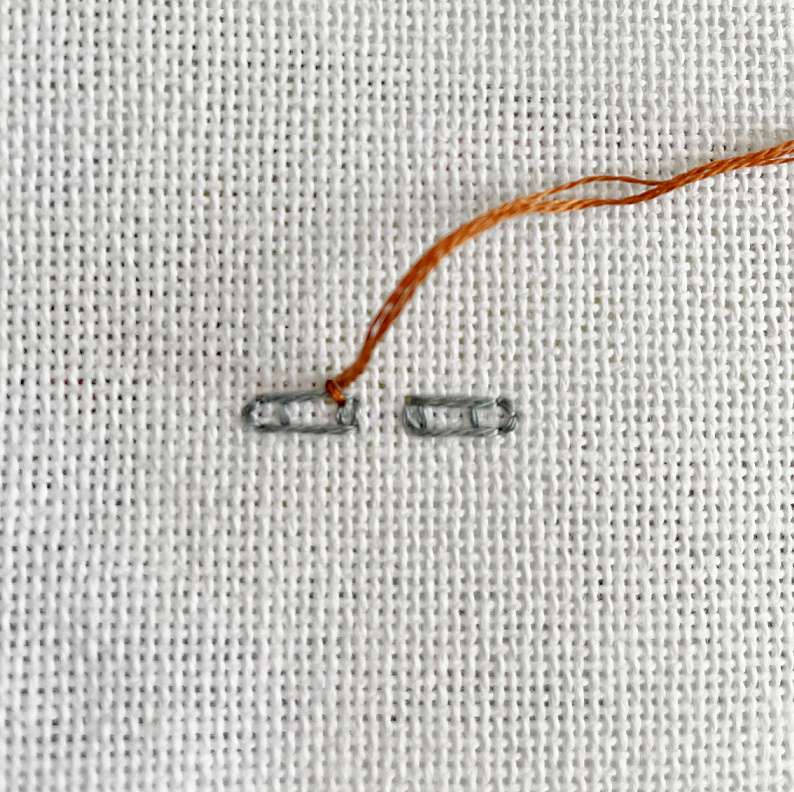
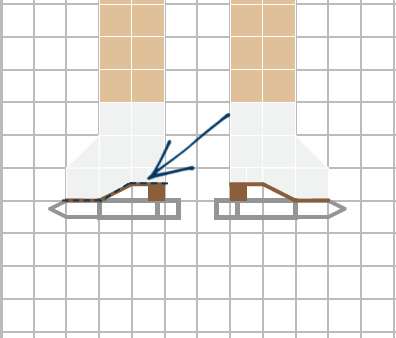
STEP 2: HEEL OF SHOE
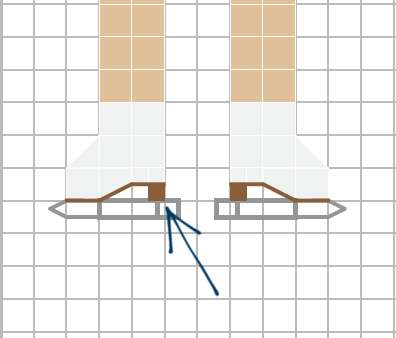
Using three strands stitch ¼ on the bottom right square of the left foot where the heel is. Do the same for the right foot, but the ¼ stitch goes on the bottom left corner.
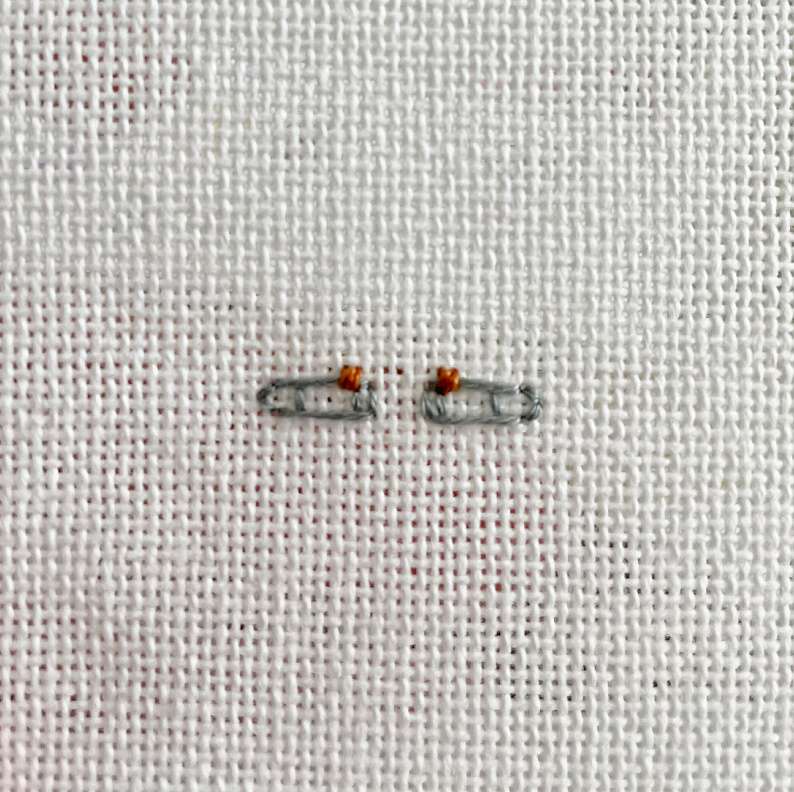
STEP 3: REST OF SHOE

Stitch the remainder of the skate’s shoe.

I prefer to do the smaller stitches first because I have found that it’s so much easier on my eyes to see where smaller stitches go on a “clear” surface!
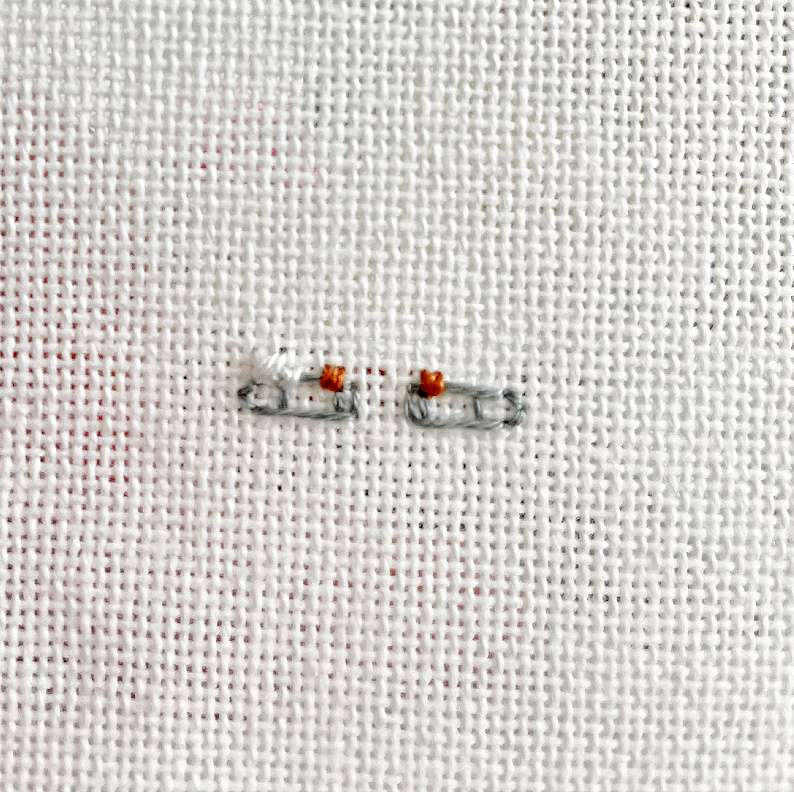
STEP 4: SHOE SOLE
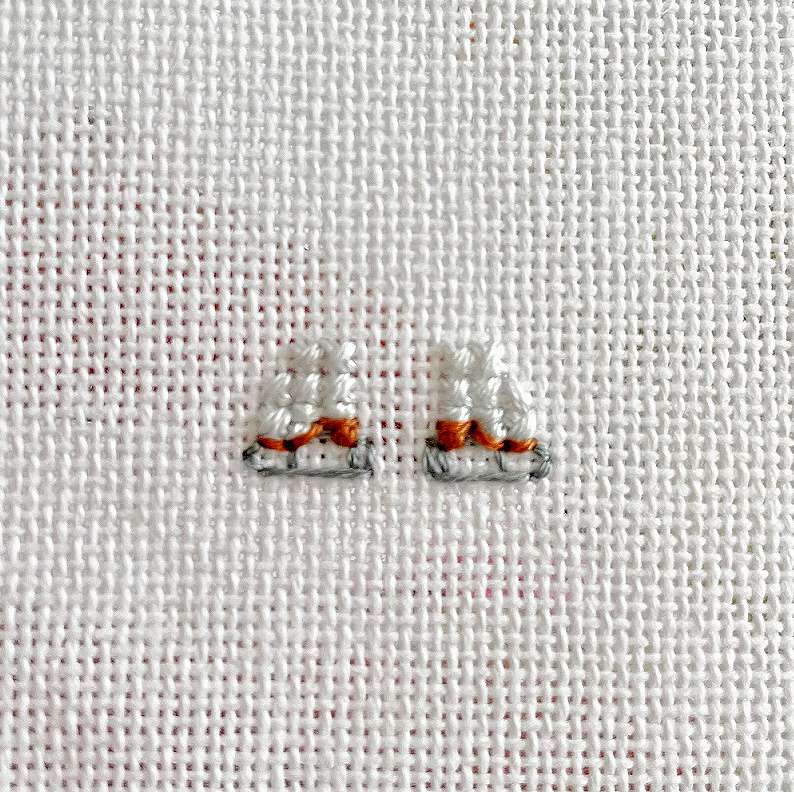
Finally, add backstitches to the sole of the skate’s shoe. And there you have them – cross-stitched ice-skates ready for the rink. Following these step-by-step type of layering suggestions gives the ice skates a more realistic type of look!
Got questions or comments? Post your thoughts in the comments below!
It’s adorable! ❤️