Amp up your Stitch People peacock pattern by Hillary Nestrick
One thing to know about me is that I love all the things sparkly and brightly colored! If it’s got glitter, shimmer, shine, rainbow colors, etc., you name it I’m going to be attracted to it! My husband affectionately calls me his little crow. I’m obsessed. So, naturally with the release of the Stitch People Jungle Animals patterns, I just HAD to pick a project, and of course I zeroed in on the peacock!
With all those bright colors, I wanted to take it up a notch! Cue the sequin, seed beads and satin floss!! However, I also wanted to use a layering technique to give it a 3D look. Y’all, this was a challenge for me, but completely worth it in the end and a fun process to teach myself!
STEP 1: STITCHER SUPPLIES, ASSEMBLE!!
First, the materials! This kind of portrait requires a few more supplies than a standard stitch!

- 14 ct Aida (that’s right, I’m representing the 14 ct for y’all!!)
- Floss (standard cotton and satin) I used DMC:
- 3847 teal green dark
- 310 black
- 740 Tangerine
- 840 beige brown – md
- S995 satin turquoise
- 5 mm cup sequin in bright green
- 11/0 glass seed beads in orange
- Size 24 or 26 tapestry needle for the stiches
- Size 28 tapestry needle for attaching the seed beads
STEP 2: CHOOSE AND CREATE YOUR PATTERN
Because of the addition of sequin and seed beads, I doubled the size of the pattern (4 squares for every 1 square…p.s. here’s a guide on how to do that). I already had the 5mm sequin and seed beads on hand from previous projects, so I just adjusted the pattern to fit them! Yes, it takes longer, but trust me, it’s totally worth it!!
STEP 3: STITCH THE BACKGROUND FEATHERS AND ADD SEQUIN & SEED BEADS
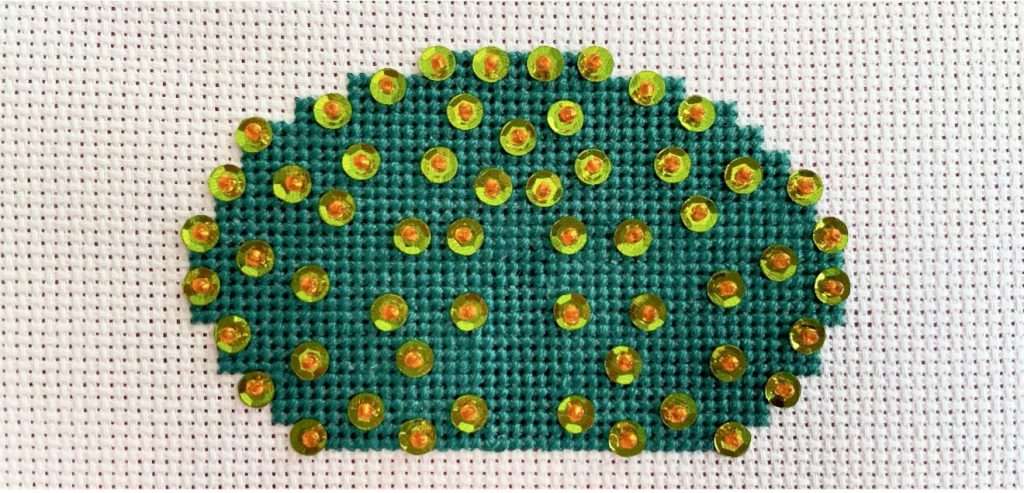
Using 3 strands, cross-stitch the background feathers, leaving a blank square where you’d like the sequin and seed beads to go. I found this to be an easier technique to make sure I added the embellishments in the spots the pattern shows.
To add the sequin and seed beads, use the size 28 needle and two strands of the 740 Tangerine floss. Start in the middle of the blank square. In this case, because we’ve doubled the pattern size, it’s going to be the center hole of the 4 blank squares.
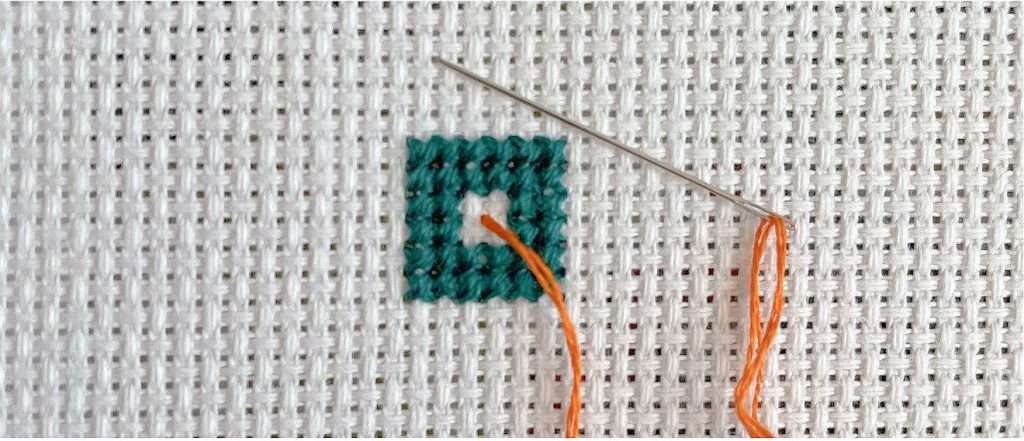
Next, add the sequin and seed bead.


To secure the sequin and seed bead, thread the floss back through the same center hole you came up through.


STEP 4: CROSS STITCH & BACKSTITCH THE PEACOCK BODY
In order to achieve the layering/3D effect, I used cross stitches, back stitches, and satin stitches. With 6 strands of satin floss (S995) cross-stitch the body. I know, I know, crazy thick and kind of a pain, but 100% worth it in the end, I promise!
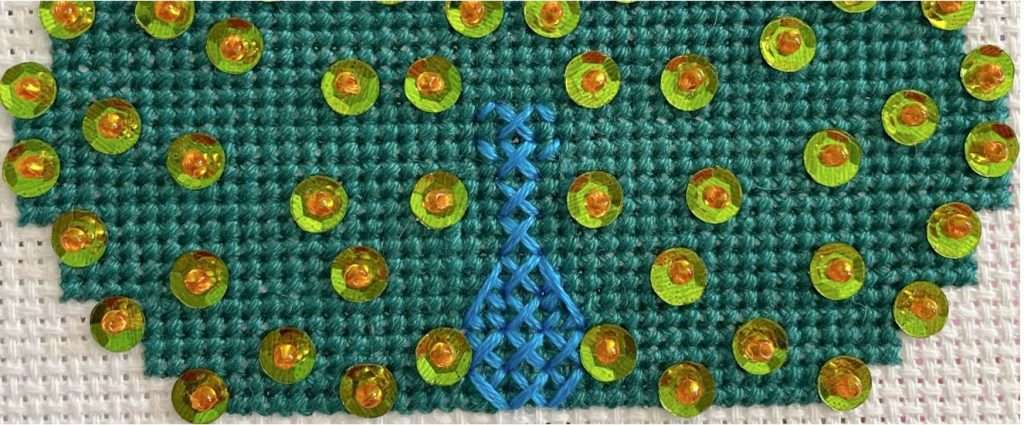
Next, continue to use 6 strands of satin floss while vertically backstitching over the cross stitches. I divided my back stitches up into sections because I felt it kept the body shape. This makes the next step easier to stitch.
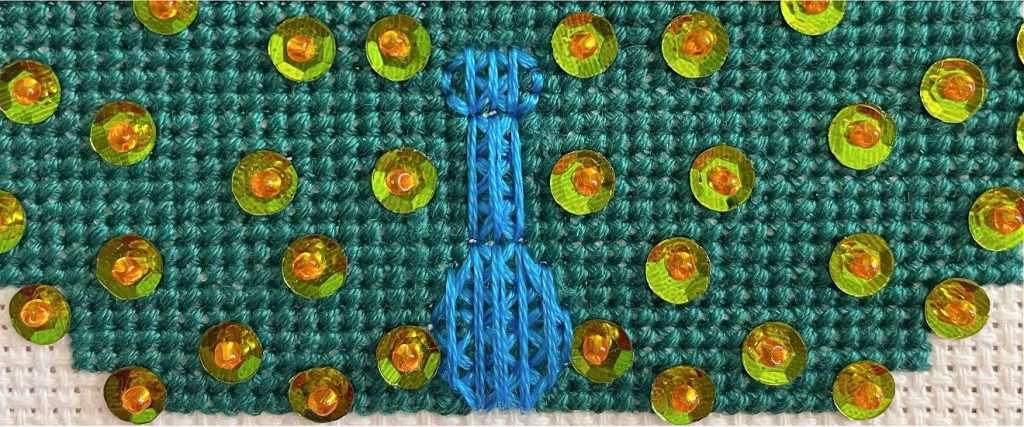
STEP 5: SATIN STITCH THE PEACOCK’S BODY AND BEAK
Still using all 6 strands of the satin floss, now make horizontal satin stitches until the area is filled. I started off by using the holes already in the fabric and then went through again and went in between creating my own “holes”.Next, using 4 strands of the 740 Tangerine cotton floss, satin stitch the beak.

STEP 6: FINISHING TOUCHES
Using 3 strands of 840 Beige brown – md, straight stitch the little top head feathers, legs, and feet and use 2 strands of 310 Black to make tiny french knots for the eyes. And there you have your beautiful, sparkly peacock!
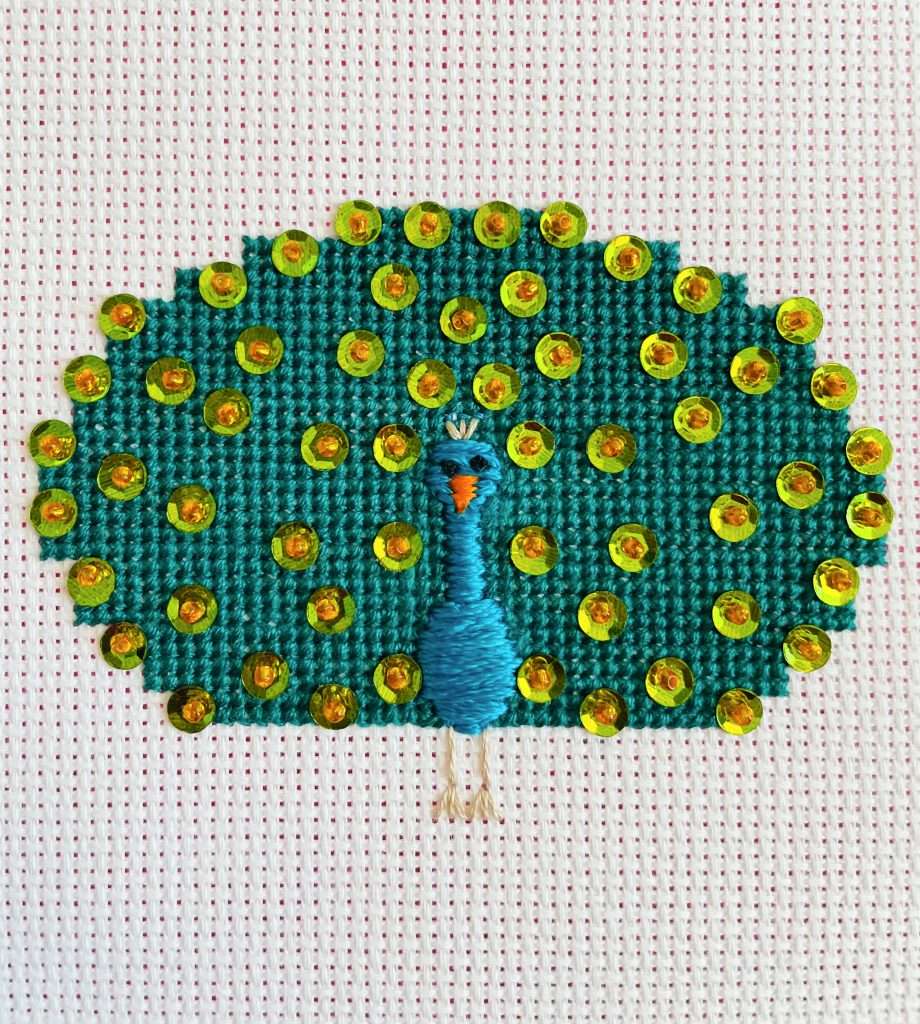
Of course you by no means have to add all the layering options to create a beautiful work of peacock art. By using cross-stitches alone, you can create a similar and slightly simpler design!
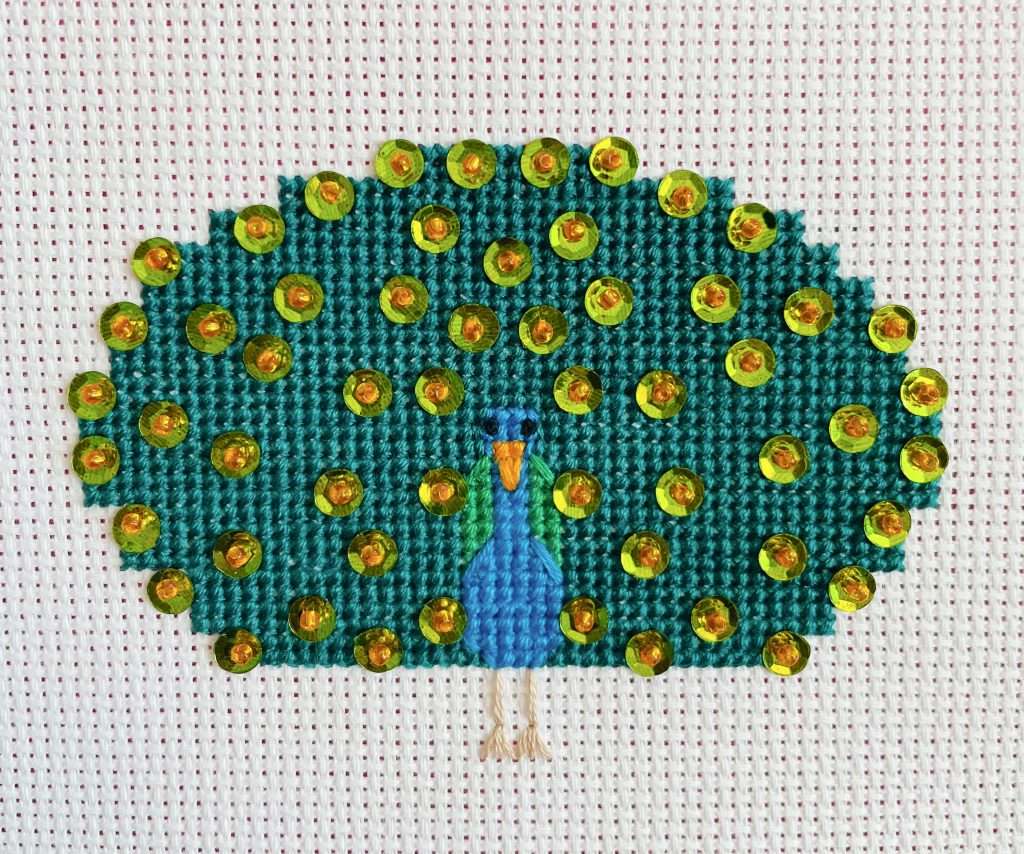
I’m so excited to frame this little guy and hang him in my office!! What would you do with your sparkly peacock? Comment below and let us know!
Hillary used Stitch People’s Jungle Animals to build this pattern. Get your set here!
Love it. Very creative